My last post was in April! I can't believe it is now almost Thanksgiving.....the bees have kept me busy this year!! This past May and June are a blur, a literal fuzzy, buzzy, blurring of bees. Bees at dawn, afternoon, dinner and dusk. Honey bees encompassing my thoughts from the moment I awoke to when I'd lay my exhausted head down on the pillow. When I drifted off to sleep, it was dreams of honeybees for me. I may be exaggerating slightly, but honestly, there were numerous spring days when this was entirely true.
Winter left me with 17 hives out of 31. Of these I needed to repay a dear friend 7 nucs with overwintered queens from the prior season. Using Mel Disselkoens OTS method of making splits and queen rearing, the honeybees and I were able to fulfill our debt of 7 nucs, sell 15 nucs and keep 5 overwintered queens and a number of starts from the overwintered hives for myself. I let the May starts with daughter queens and the 2016 overwintered queens build up again until July and then split them again. I also hived six swarms.
I am going into winter with 63 hives, the large majority of those being July starts with On The Spot Queens. Mating success this year averaged to be near ninety percent. The failures were due to virgin queens never returning resulting in working layers. I do not try to save working layer hives, I count them as a loss. I shake out the bees and give their combs and stores to other hives.
Thanks to the patience and time of another seasoned beekeeper, I also learned how to mark my queens this summer and began to learn how to graft. I got a taste of the process and steps of grafting but I am in no way able to graft larva well enough yet to raise quality queens with grafting. I will continue to increase my knowledge and skills in that area but for now I will continue to raise queens using OTS queen rearing. To my knowledge, in the past four years of raising queens this way, I have never had an OTS queen rejected, killed or superseded. Once she comes back from her mating flight and starts to lay, I no longer worry.
I took many photos of honey bees and honey bee related activities over this past bee season. Below each I give some explanation. I hope it will help explain how I keep bees and why I use the methods that I do. Some are just honey bees on flowers, my favorites :-) Sorry, but the pictures are in no particular order.
 |
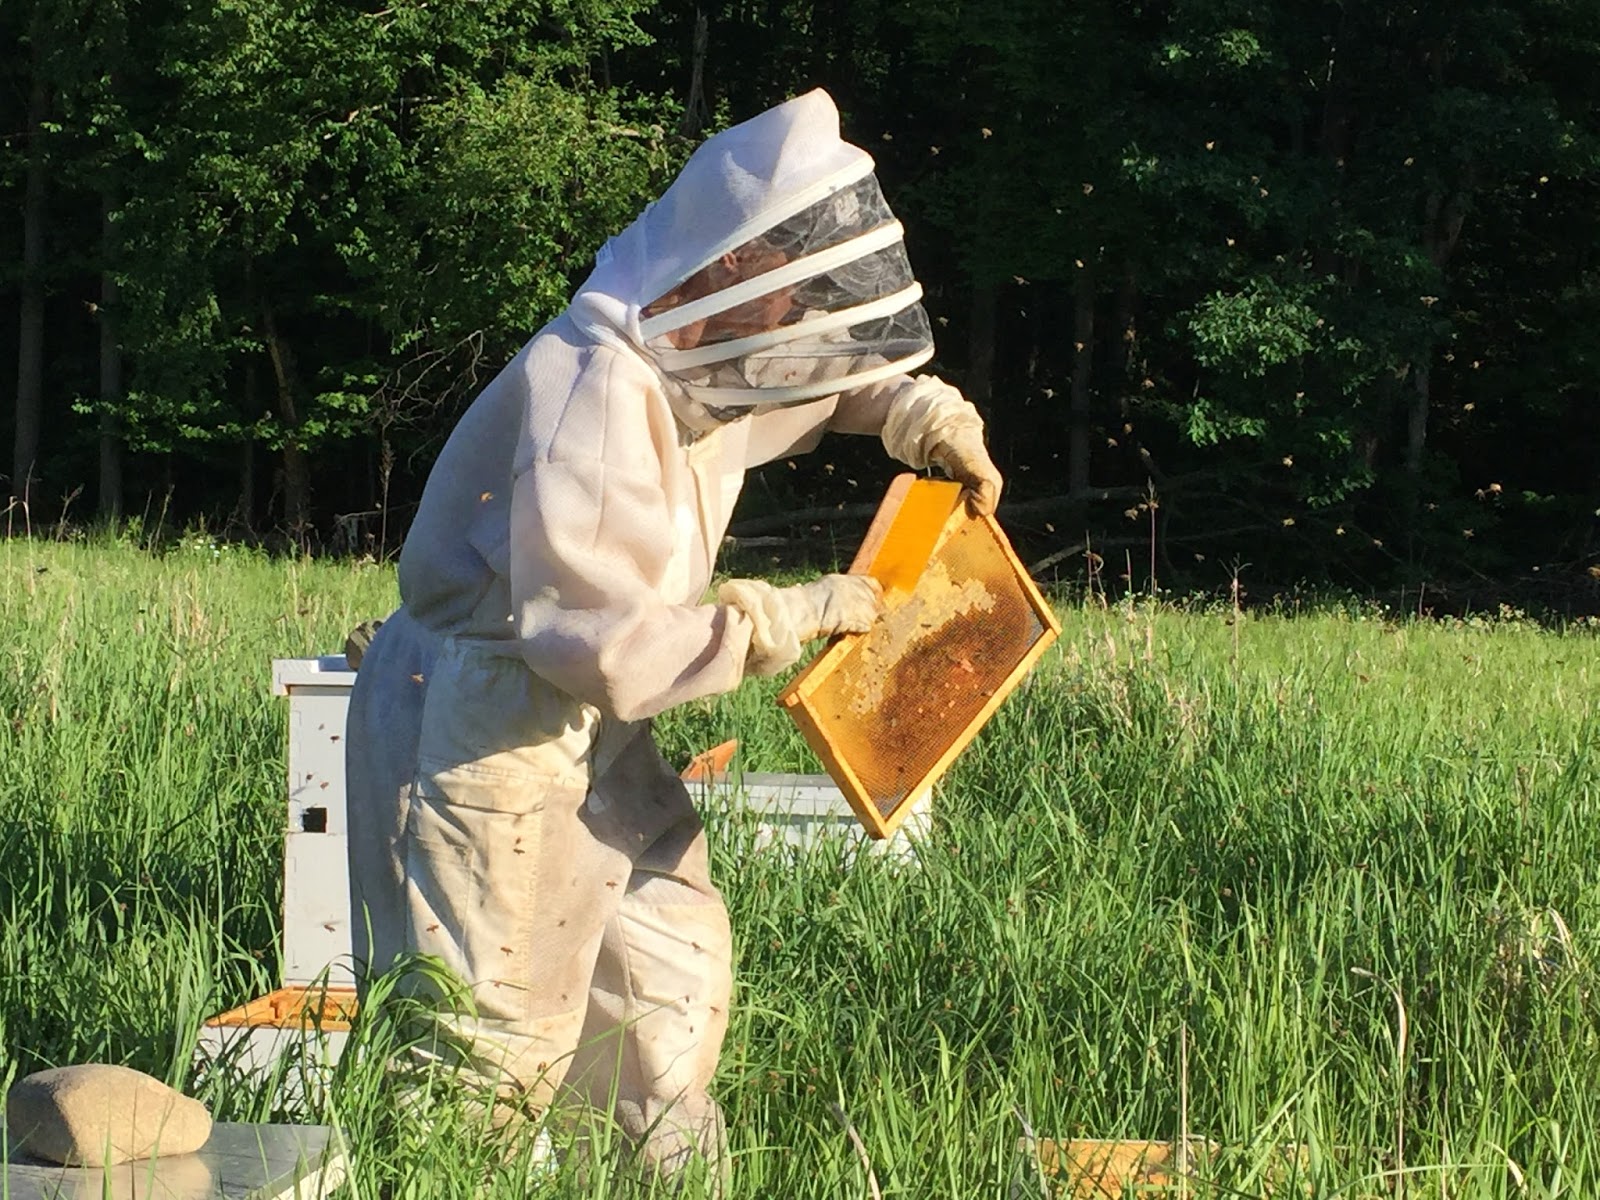
| Me, proudly showing off a beautiful brood frame from a 2017 OTS Queen. June,2017. Nucs ready for pick up in the background. |
 |
| February 22, 2017. The Silver Maple at the end of our street bloomed! Honeybee on Silver Maple Bloom. |
 |
| Myself holding a frame of "wall to wall" brood! Newly mated OTS 2017 Queen. | June, 2017 |
 |
| My "Barber" swarm. I was called by the Barber in Moline, MI to come and get this swarm. It was about 3 ft off the ground. This swarm came exactly one week after I had gotten a larger swarm on the exact same tree. Pheromones must have been lingering there. | |
 |
| I mentioned I had experimented with grafting. I also did some work with some queen cells. Mentored under another long time beekeeper, I used baby nucs for mating these queens from cells and then introduced them using the method you see in picture above. I news papered the newly mated queen over top of the queenless hive. |
 |
| One of my first swarms of the year up in a pine tree. Why do they love pine trees so much?!? |
 |
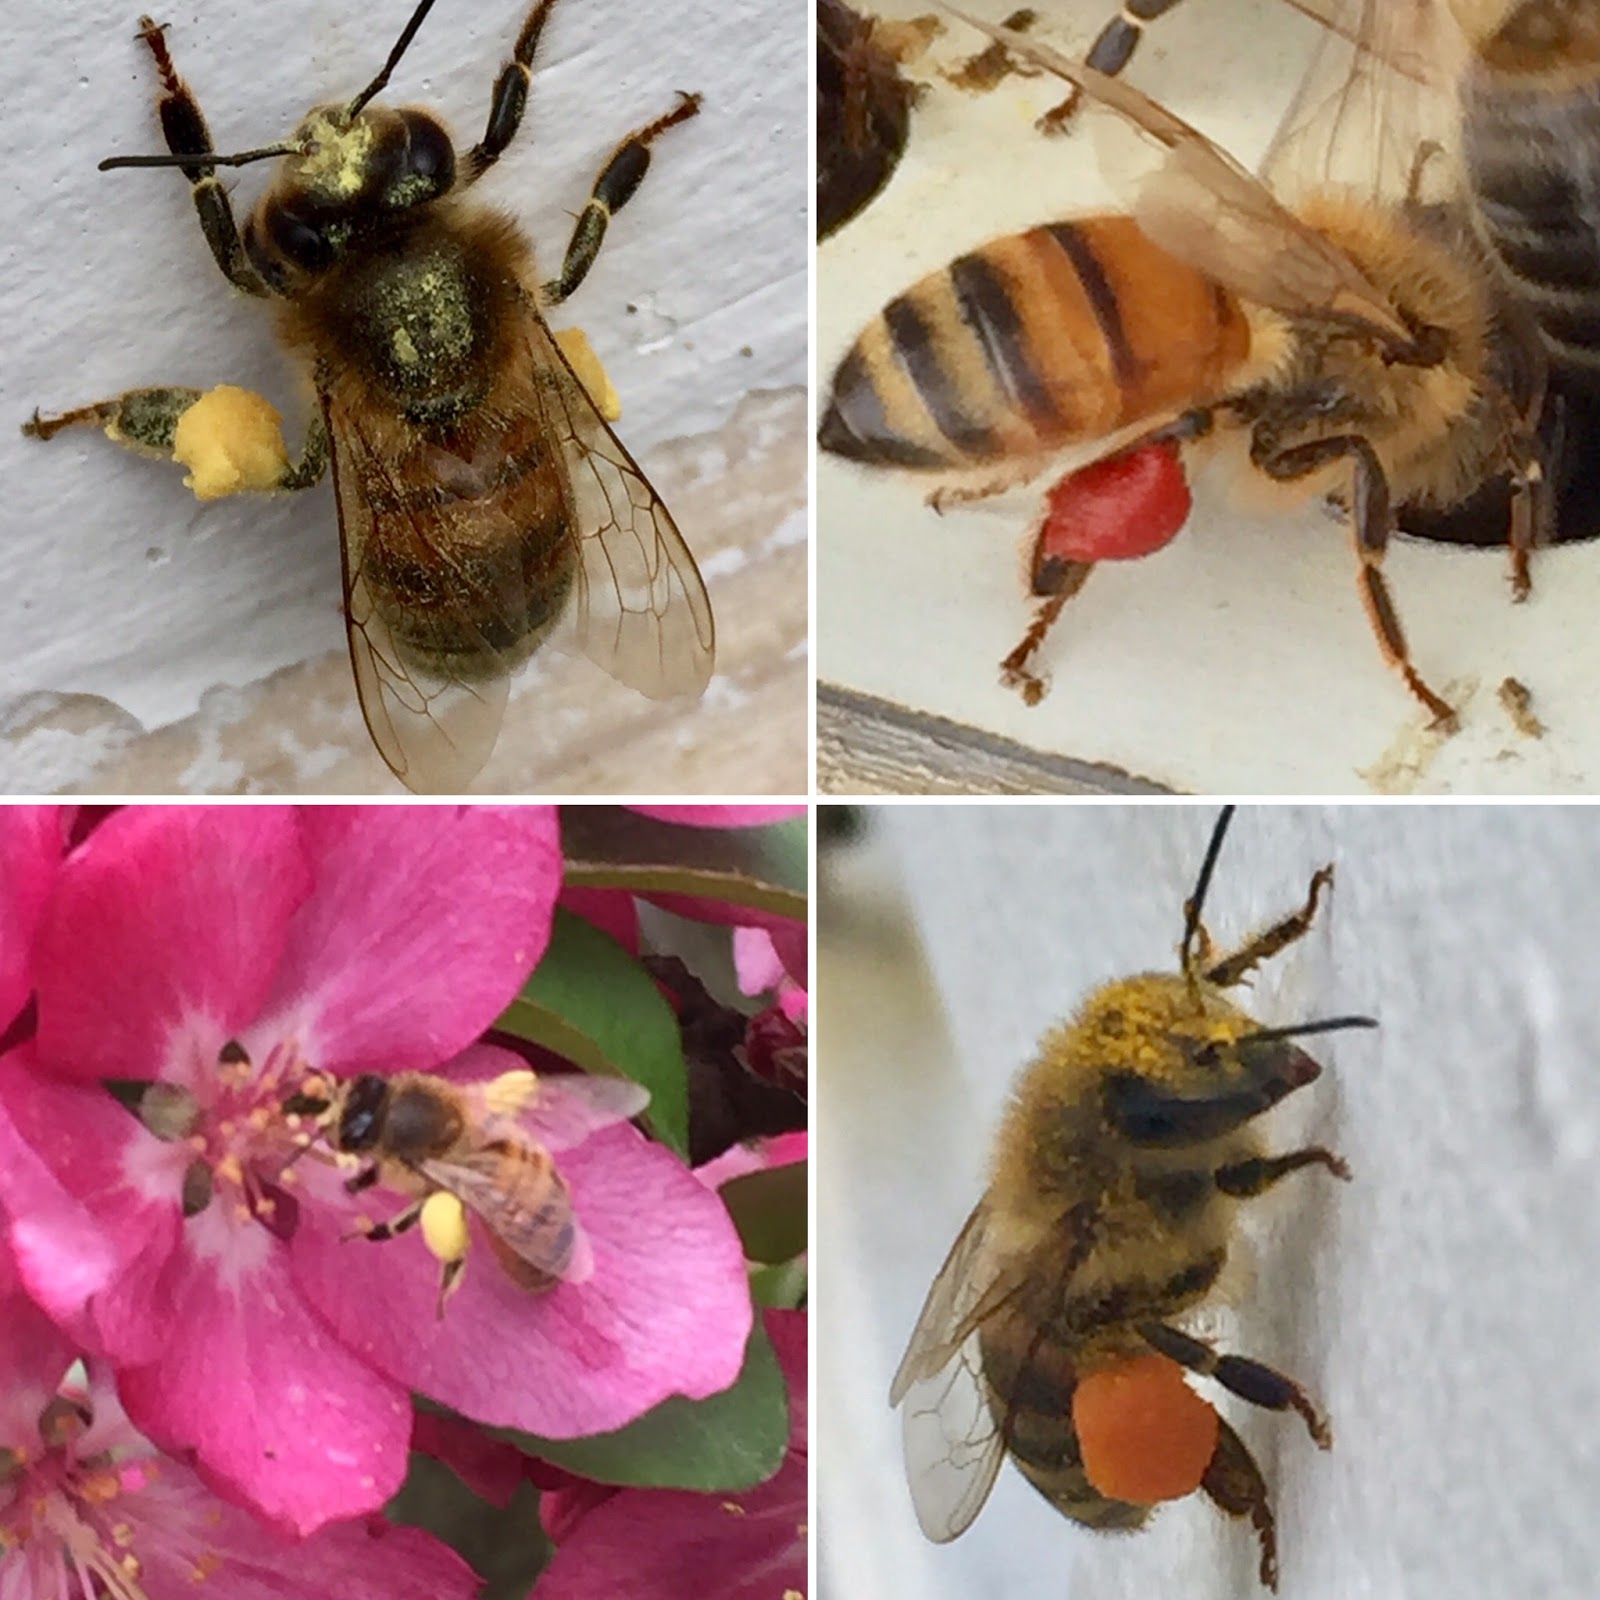
| Oh Spring!! I miss you already. Red pollen top right I've been told is from purple dead nettle. Bottom left is honey bee on crab apple tree blossom in my yard. April/May 2017 |
 |
| Honey bee on Honey Suckle in my yard. Late May, 2017. |
 |
| Aaaaah yes, amazing brood pattern!!! June 2, 2017. The solid work of an OTS Queen. Thanks Mel Disselkoen. |
 |
| Middle of September, 2017. Time to top off all the July starts I made. I take no honey from splits I make in July. I am happy if they fill a single deep prior to winter. I feed them sugar syrup the last two weeks of September. I use frame feeders that you can see in the bottom lower right of the picture. They hold one and a half gallons of feed. The bees can drain that in 3-4 days if they are healthy. |
 |
| First week of June, 2017. Nucs brought back to my home yard, waiting to be picked up and brought to their new homes buy their new beekeepers later in the evening. Selling nucs was fun and exciting but also sad. I hated to part with those new queens and their beautiful brood..... but I realize I cannot keep them all even though I want to. It was exciting to know my bees were going all over the state of Michigan and down into Indiana. A couple of them even made it to the upper peninsula! |
 |
| Pollen traps. I tried the pollen traps this season. This is a picture of one on the front of the hive. This is a summer evening in early June and they are hanging out in it. The barrier/trap they have to go through to get in discouraged these foragers to head in that night. In 24 hours this hive brought in close to two cups of pollen!! It was amazing. I only left them on for a day or two. I felt guilty taking the pollen, silly I know. Maybe next year I'll play with pollen traps again. |
 |
| Picture of the pollen in the bottom of the pollen trap. June 2017. Collected nearly two cups from this hive in 24 hours!! |
 |
| Me brushing bees off a frame from a laying worker hive. June, 2017 |
 |
| Me, with ever present hive tool in hand :-) |
 |
| Newly mated queen, just marked. I did not mark this queen. My marks did not look near as nice as this. On one of the queens I marked, it looked more like a stripe all the way down her body. oops. Need more time and practice marking :-) |
 |
| Rainbow in one of my new yards. June 2017. |
 |
| Honey bee on Sumac. This is the first year I've caught them on it. I didn't realize how many dainty little flowers were on Sumac and how beautiful they are! June, 2017. Dorr, MI. |
 |
| Honey bee on Canadian Thistle. August, 2017. Bentheim, MI. |
 |
| Honey bee alighting on Star Thistle, Dorr, MI. July, 2017. |
 |
| Honey bee on Buckwheat Bloom, Dorr, MI. June, 2017. |
 |
| Honey bee on Star Thistle, June, 2017. Dorr, MI. |
 |
| Honey bees gathering nectar from Sumac, late June, 2017. Wayland, MI. |
 |
| Honey bee on Loosestrife. Dorr, MI. |
 |
| July, 2017. POLLEN in frame!! |
 |
| Field of bee balm, many pollinators enjoying this. Hopkins, MI. July 18, 2017. |
 |
| Honey bee on bee balm. July 18, 2017. Hopkins, MI |
 |
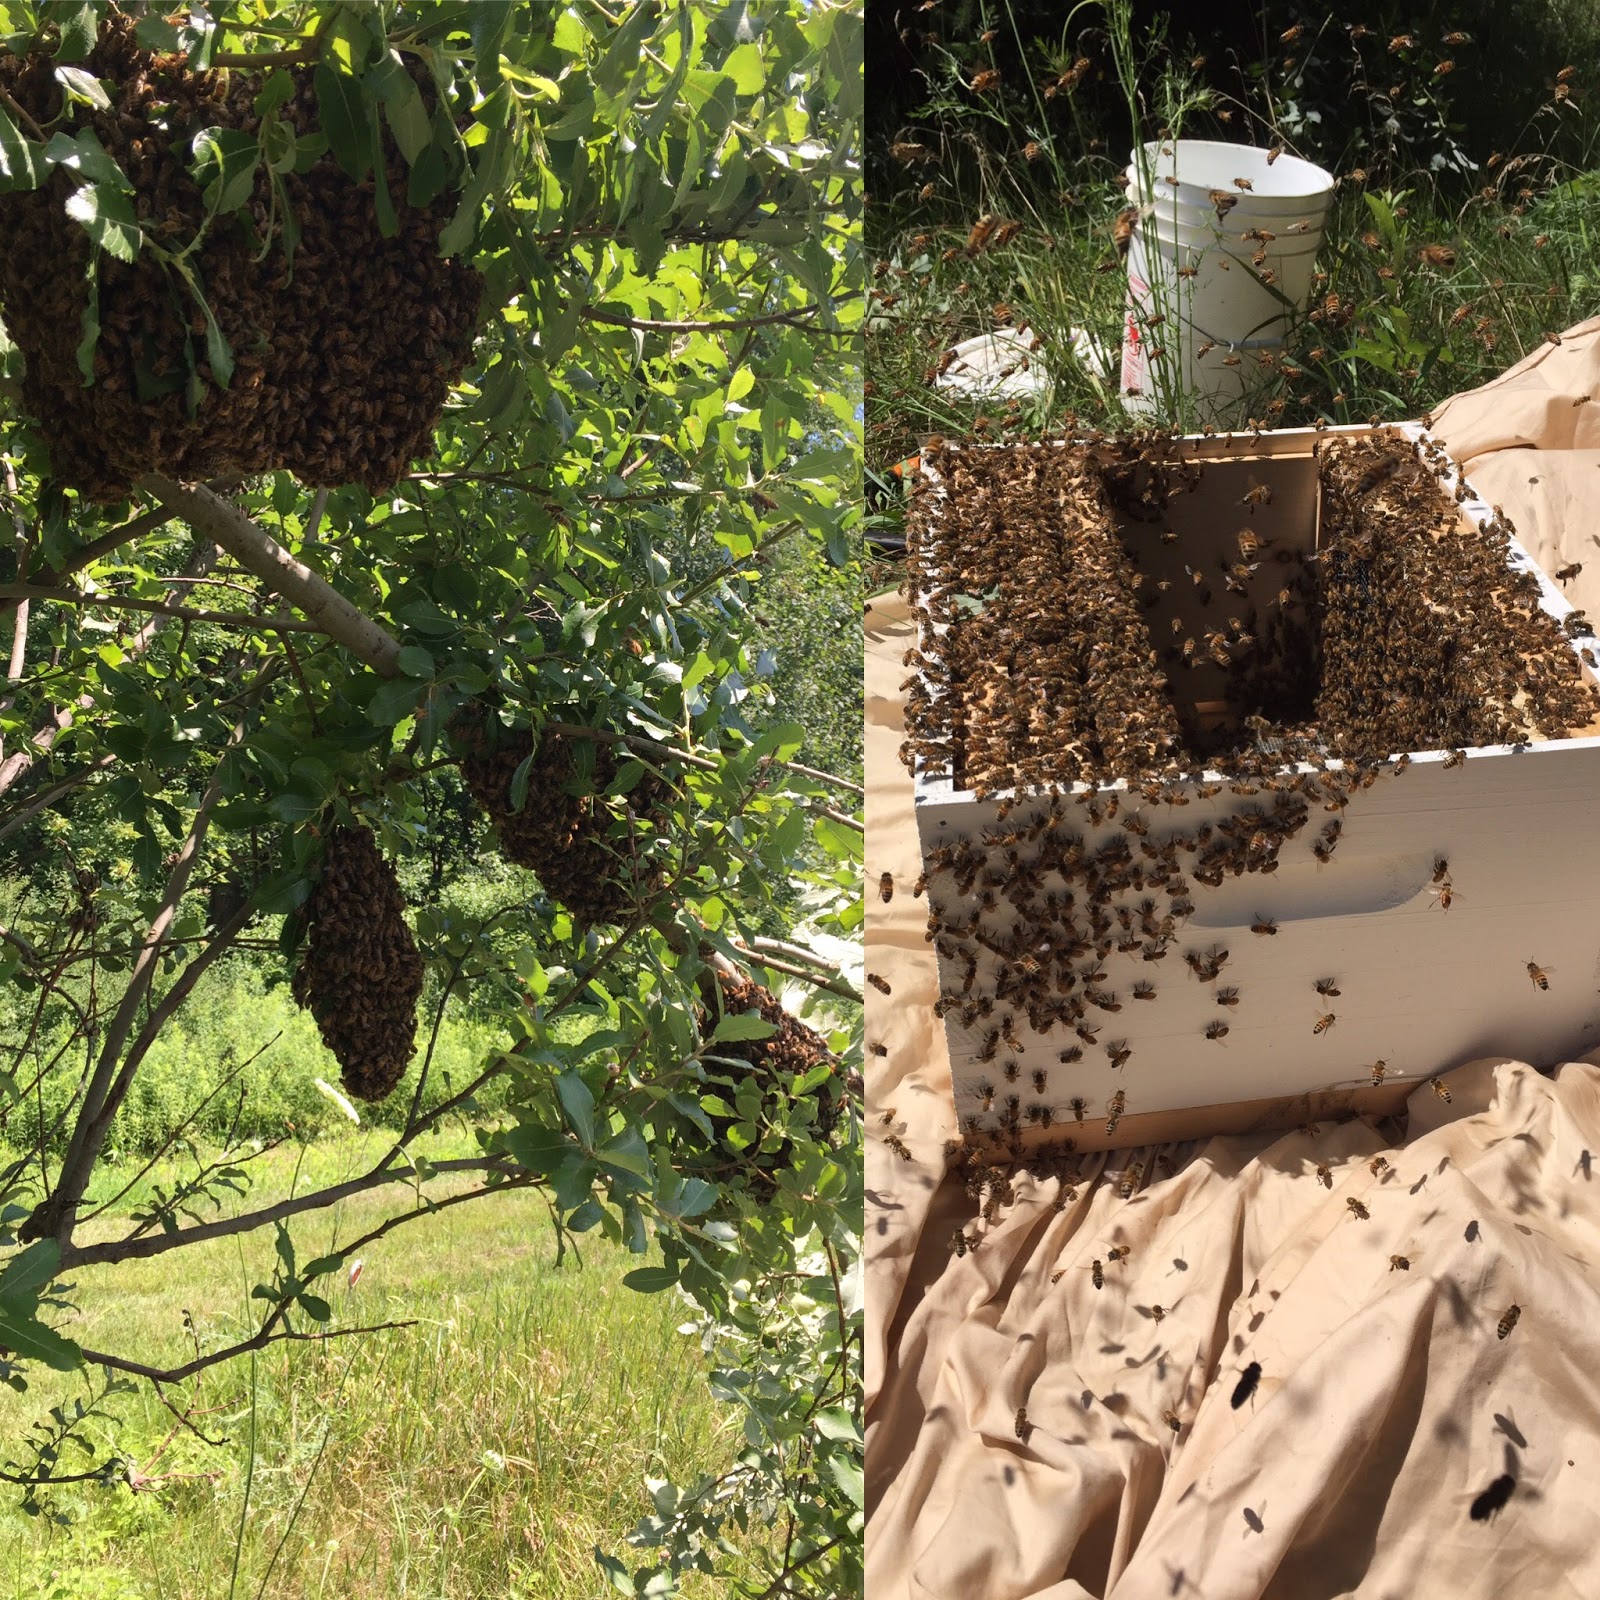
| Crazy weird swarm in four parts! July 2016. Wayland, MI. |
 |
| Honey bee on Canadian Thistle, July 14, 2017. Bentheim, MI. |
 |
| September bloom, unidentified. |
 |
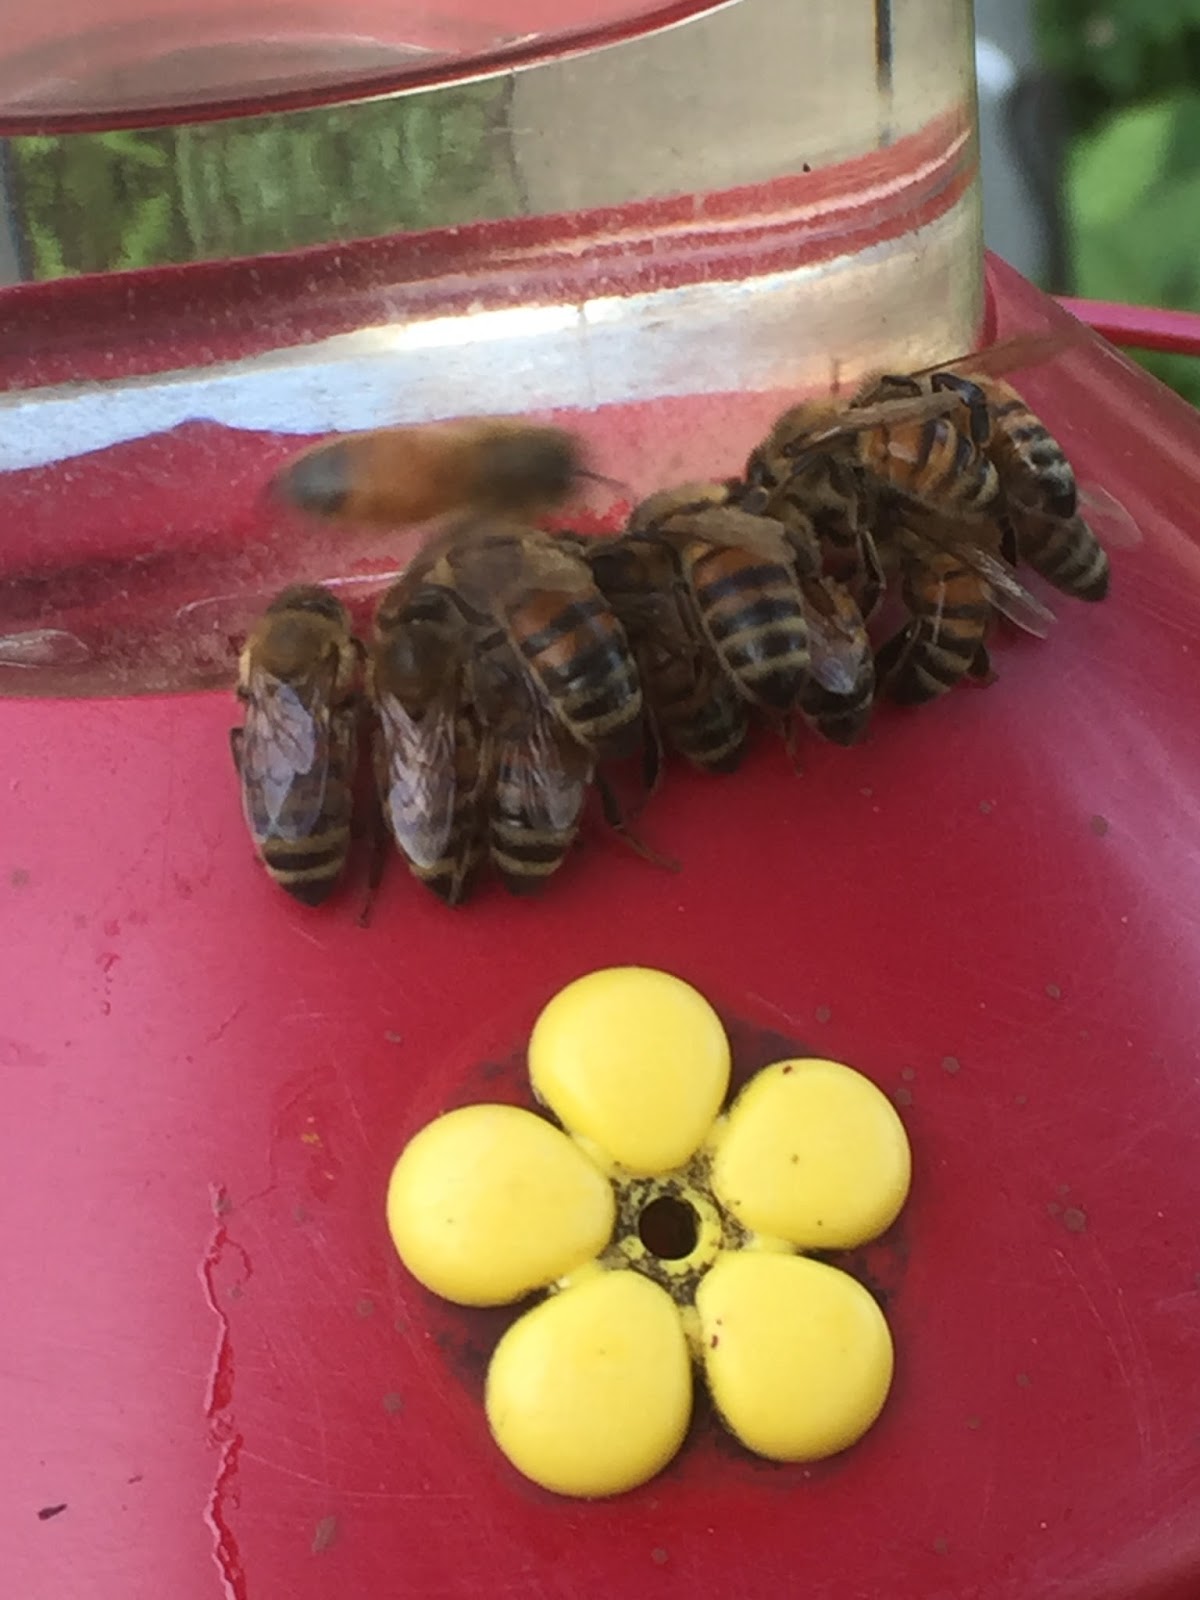
| Naughty honey bees on my hummingbird feeder, October, 2017 |
 |
| Honey bees with suspected goldenrod pollen, Sept, 2017. |
 |
| New yard sheltered by pine trees in Hopkins, MI. These make for a wonderful wind break. Have fifteen hives there this winter. Hoping for the best! |
 |
| Honey bee on Chicory, such a pretty blue. Rear view with creamy white colored pollen. August 12, 2017. Dorr, MI. |
 |
| Honey bee on Golden Rod. Sept 2, 2017. Dorr, MI. |
 |
| Honey bee on Golden Rod with pollen. Sept 2, 2017. Dorr, MI. |
 |
| Crazy late swarm, Sept 2, 2017. So a late swarm is bad for many reasons. Why did it swarm so late?? Varroa mite infestation likely. Should have done a mite count on these girls, but didn't. Shouldn't have kept them, but did. It is my little experiment. Because it was a good size swarm, I hived them. Treated them with an oxalic dribble while they were still broodless and fed them for 2 weeks. They were also given some empty drawn comb and a couple frames of honey. Within weeks they drew out 5-6 combs and the brood pattern was top notch. We'll see how they do through the winter. If they don't make it, they still drew out six frames of foundation for me. |
 |
| The Sept 2 Swarm still hanging out in the tree before I hived them. The swarm is in top middle to right of the tree. See picture above for more info. |
 |
| Yes that is all SUGAR! You would not imagine the questions and comments you get while waiting in line at Costco with all this sugar on your cart. When I respond that it is for Honey bees, you'd think I was a Super Hero!! People around me and the cashiers start thanking me and patting me on the back, telling me what great work I'm doing. So much so that I thought next time I just might ask for donations ;-) Love that the general public is so pumped up about Honey bees :-) My kids, on the other hand, vowed they'd never go to Costco on a sugar run with me again. |
 |
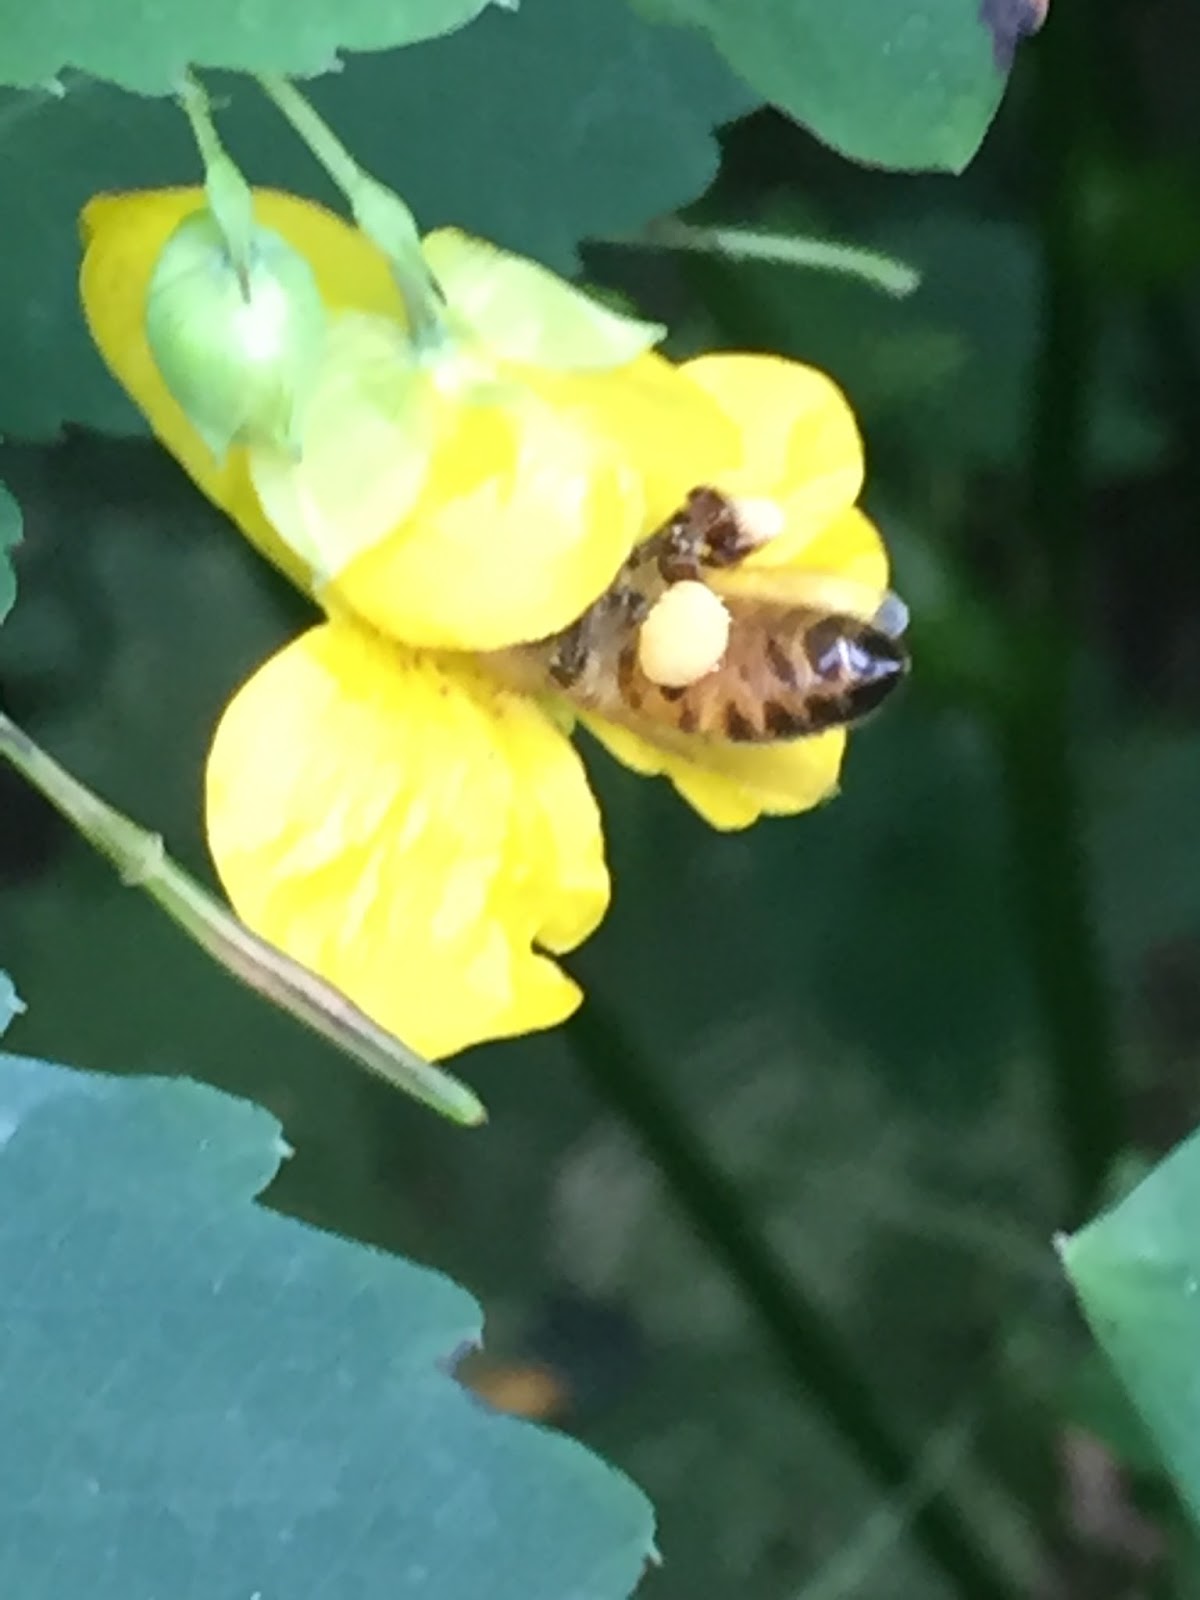
| Honey bee on yellow Jewel Weed. September, 2017. Hopkins, MI. First time I had seen the yellow, I usually find the orange. |
 |
| My faithful Dadant smoker! Pine needles and Sumac work for me! |
 |
| Honey bee on Zinnia, I plant these from seed every year. Rows and rows of them. They bloom till frost. I've seen honey bees and bumbles still working them in October. |
 |
| An Autumn favorite. Honey bee on Sedum. Dorr, MI. September, 2017. |
 |
| Honey bee on Zinnia, July, 2017. |
 |
| I broke open some honeycomb while breaking apart supers. Didn't take but seconds for these girls to take advantage and have some of their hard earned reward. |
 |
| Honey bee on Milkweed. June 19, 2017. These smell lovely. |
 |
| Older forager Honey bee on Milkweed bloom. See her frayed wings?? June, 2017 |
 |
| Going in. Honeybee on Jewel Weed. September, 2017, |
 |
| Loaded down with pollen. Honey bee on Jewel Weed bloom. Sept, 2017. |
 |
| Late June 2017 Swarm. Why can't they all be this simple? Four feet off the ground. One snip of the branch and into the box you go! |
 |
| With all those starts, I needed more equipment!! Thanks Wayne for being supportive in letting me expand and helping me transport all these boxes and frames back home :-) July 3, 2017. |
 |
| Honey stomach full. Little belly almost translucent with nectar! |
 |
| Honey bee on Queen Annes Lace! I honestly did not think bees worked the Queen Annes, I was wrong. Not only Honey bees but other pollinators too. August 12, 2017. |
 |
| Love, love, love new wax with snow white cappings over freshly cured nectar!! July, 2017. |
 |
| I had a swarm for every month this season. This is the August 8 swarm. |
 |
| Honey bee on Joe Pye Weed, August 12, 2017. Dorr, MI. |
 |
| Honey bees on Rose a Sharon bloom. August, 2017 |
 |
| Late summer forage of Iron Weed, and Queen Anne's Lace.
Sept 25, Dorr, MI. Honey bee on Aster. |
 |
| Honey bee on type of mint bloom, August 13, 2017. |
 |
| The crazy four part swarm hived. July 16, 2017. I found a sheet to be extremely valuable this year when hiving swarms. |
 |
| Honey bee on white Joe Pye Weed. |
 |
| Honeybee on Alfalfa bloom, Sept. 15, 2017. I have hives on the edge of a farmers hay field. I was so please when he said he lets the alfalfa bloom before cutting. I know honey bees are not the most efficient at pollinating alfalfa but nice to know if there wasn't other forage available in September that acres of this was right outside the front step of their hives |
|